
Step-by-step guide: DIY dog bandana for fashionable canines

Unleash your inner designer and get ready to pamper your beloved pup with the latest trend in canine fashion – DIY dog bandanas! If you're looking for a fun and creative way to spruce up your furry friend's wardrobe, this step-by-step guide is the paw-fect answer. Say goodbye to plain and generic accessories, and say hello to a world of trendy bandanas, tailor-made for your fashionable canine companion. Who said fashion was just for humans? Our loyal and adorable four-legged friends deserve to strut their stuff in style too. With a little imagination, a touch of craftiness, and a whole lot of love, you can transform ordinary pieces of fabric into charming bandanas that express your pup's personality and make them the talk of the town – or bark of the park!
How to create a dog bandana at home?
Materials:

- Fabric of your choice
- Sewing machine or needle and thread - Depending on your sewing skills and preferences.
- Scissors - For cutting the fabric.
- Measuring tape or ruler - To ensure accurate measurements.
- Iron and ironing board - For neat folds and creases.
- Fabric chalk or pencil - To mark the fabric for cutting.
- Velcro or snaps - For securing the bandana around your dog's neck.
- Optional: Fabric glue or fusible bonding tape - If you prefer a no-sew option.
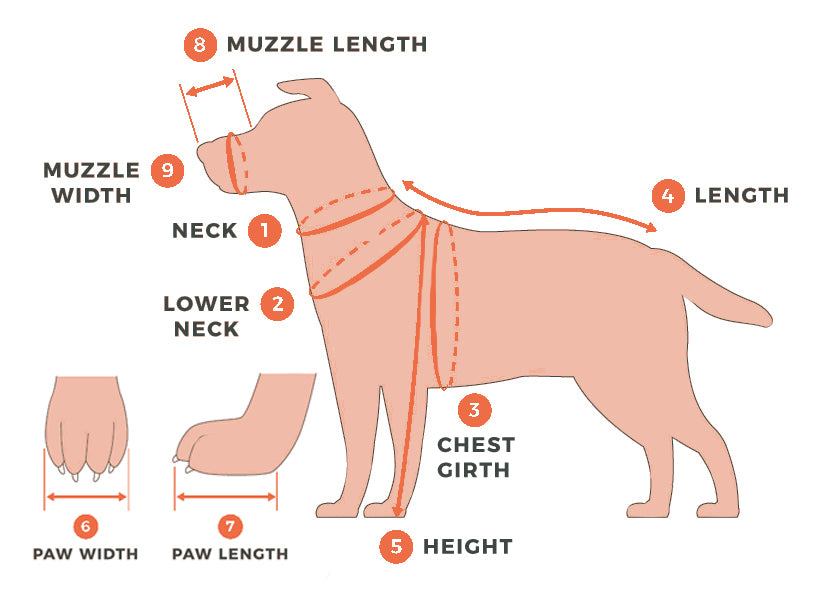
Step 1: Measure your dog's neck size
To ensure the perfect fit for your diy dog bandana pattern, it is important to measure their neck size accurately. Start by using a measuring tape and gently wrap it around your dog's neck where you want the bandana to sit. Remember to add a few extra inches to this measurement so that there is enough room for a comfortable fit and space for the closure mechanism such as velcro or snaps. This additional allowance will also allow flexibility in case of any fluctuations in your dog's neck size over time.
Step 2: Cut the fabric

After you have obtained the precise measurement of your canine's neck, it is time to precisely trim a piece from your selected fabric in either square or triangle shape, utilizing the marked measurements. The size of this fabric piece will differ based on the dimensions of your furry companion; however, for dogs that are medium-sized, a typical dog bandanas diy generally has each side measuring around 20 inches. When trimming out the material, ensure to employ sharp scissors or a rotary cutter to achieve neat and tidy edges.
Step 3: Fold and iron the edges
To achieve a polished finish and avoid any fraying, start by folding approximately ¼ inch of each side of the fabric square inward. Use an iron to press down on these folded edges until they become flat. By doing so, you will create clean boundaries that maintain the integrity of the fabric. This meticulous step ensures that your project has a professional look while also guaranteeing its longevity.
Step 4: Sew the edges (or use fabric glue/fusible bonding tape)
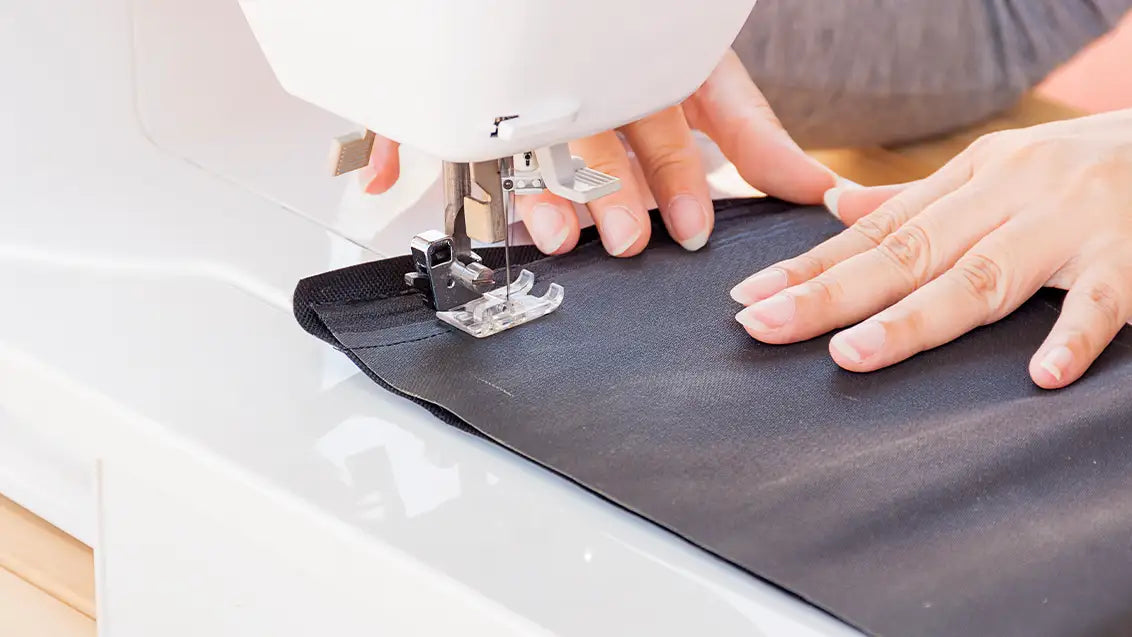
When operating a sewing machine, it is crucial to sew parallel to the folded edges of the fabric square so that they remain firmly connected. Failing to secure the stitches adequately may result in the fabric disassembling and compromising its overall durability. If sewing is not your preferred method, there are alternative approaches for joining the edges of your fabric square. One option is using fabric adhesive or fusible bonding tape, both of which can serve as effective substitutes for stitching.
Step 5: Attach the closure
When it comes to securing the bandana around your dog's neck, you have a few options to consider. Velcro and snaps are both reliable choices that work well in this situation. To ensure a secure and comfortable fit for your pet, take the time to sew or attach the closure of your choice onto the ends of the dog bandanas diy. By sewing or attaching either velcro or snaps as closures, you will have peace of mind knowing that the bandana won't easily come undone during playtime or walks with your furry friend.
Step 6: Try it on your pup

Once you have securely fastened the closure of the diy dog bandana, it is crucial to try it on your furry companion in order to confirm that it fits well and provides adequate comfort. The dog bandana diy should be snug enough so as not to easily slip off, yet avoid being too tight which can potentially cause discomfort for your pet. By achieving a proper balance between security and comfort, you can guarantee that your beloved furry friend will feel comfortable while sporting their new accessory.
Step 7: Show off your fashionable pup!
Now that your DIY dog bandana pattern is finished, it's time to proudly display your pup's stylish new accessory. Whether you're taking a leisurely stroll in the park, attending a pet-friendly gathering, or simply capturing adorable photos for social media, be prepared for your fashion-forward canine companion to capture hearts everywhere they go. This meticulously crafted and unique dog bandana diy will not only add flair to their ensemble but also showcase your creativity and dedication as a pet parent.

By following this comprehensive guide, you have the opportunity to craft a diverse selection of diy dog bandanas for your beloved pet, catering to their individuality and adaptability. Innovate by experimenting with a variety of fabrics, intricate patterns, and vibrant colors as you curate an impressive wardrobe that perfectly reflects your dog's distinctive style.
Cherish every moment spent engaged in this creative endeavor alongside your loyal four-legged companion while embracing the boundless possibilities available when it comes to pampering our furry friends with fashionable accessories.
Explore the range of dog bandana designs available at Nestpets.